
When your LaCie drive suddenly gives up the ghost, the fix is often surprisingly simple. Before you start diving into complex software repairs, take a breath and methodically check the basics: the USB or Thunderbolt cable, the power adapter, and the port you're using. You'd be amazed how often one of these is the real culprit.
Your First Steps to Fix a LaCie Hard Drive
We’ve all been there. You plug in your LaCie drive, ready to work on a big project, and… nothing. Just silence. That sinking feeling is awful, but don't panic. The worst thing you can do right now is start clicking random things and potentially make the problem worse.
The initial triage is all about ruling out the easy stuff. Think of yourself as a detective at a crime scene—you're looking for simple clues before assuming the worst. More often than not, the issue isn't a catastrophic drive failure but a simple communication breakdown between your drive and computer.
The Power and Connection Checklist
Let's start with the absolute fundamentals. Larger LaCie desktop drives, in particular, need their own dedicated power source to function.
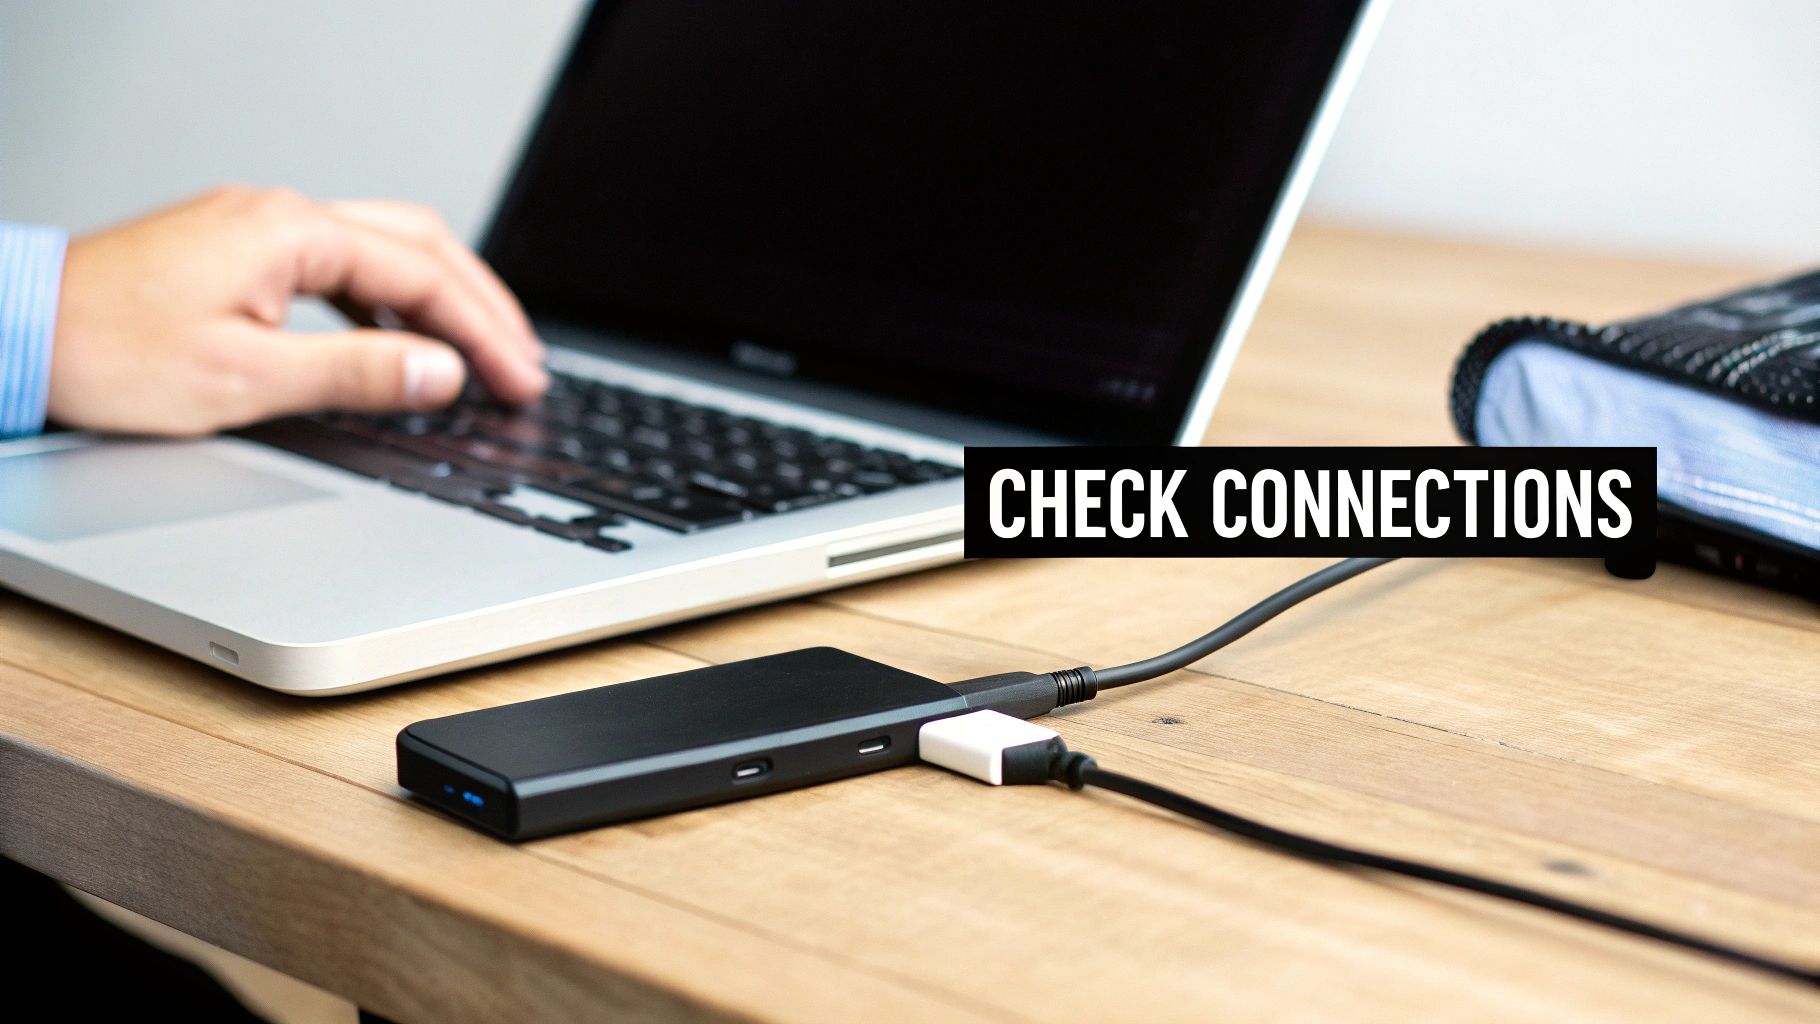
- Check the Power Adapter: Is the AC adapter plugged in securely at both ends? Look for the little LED on the power brick or the drive itself. If it’s not lit, try a different wall outlet you know works.
- Test the Cable: Cables are the weakest link. They get twisted, bent, and eventually wear out. Grab another known-good cable and see if that does the trick. If you’re using a USB hub or dongle, bypass it completely and plug the drive directly into your computer.
- Swap Computer Ports: A finicky port on your computer can easily mimic a dead drive. Unplug the LaCie and try every other available port. If it suddenly springs to life in a different port, you've found your problem—and it's not the drive.
This quick flowchart breaks down those first crucial checks, walking you from the initial connection to inspecting cables and ports.
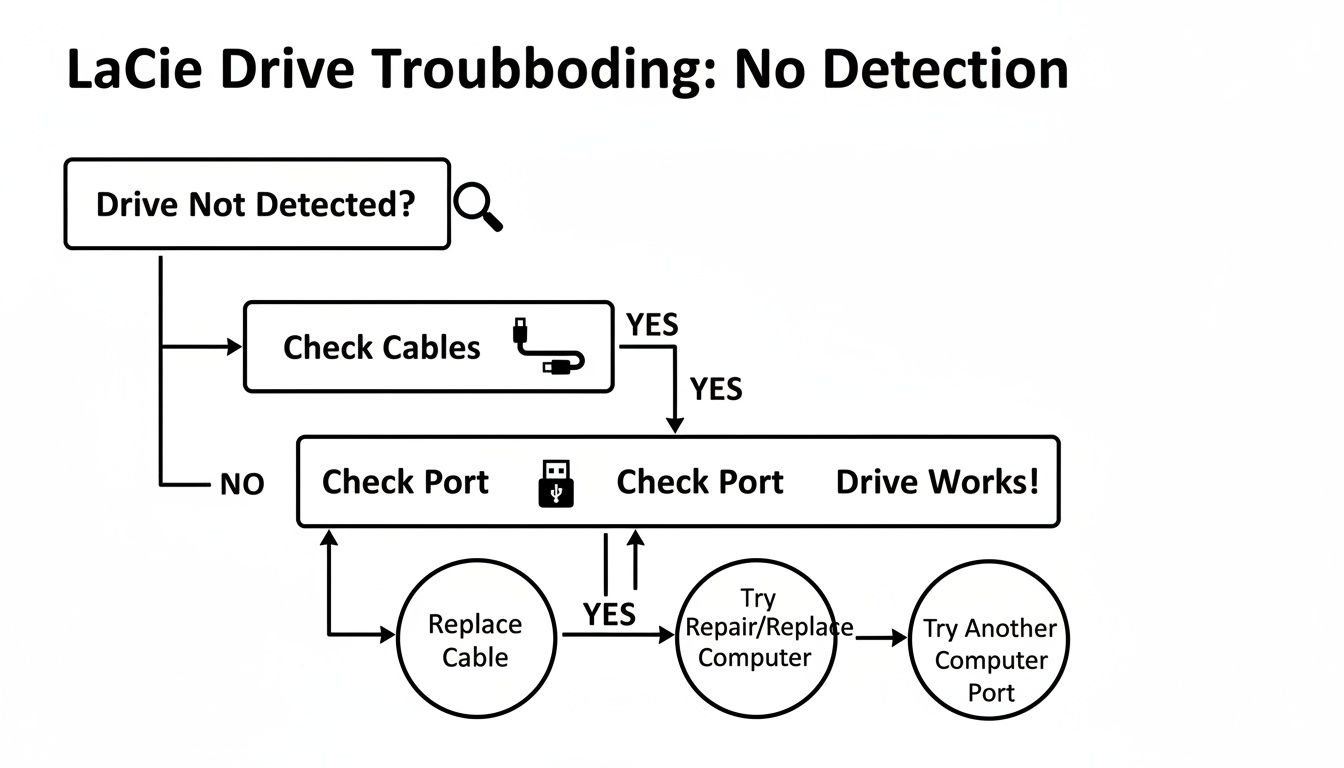
Before you even think about software, you have to be 100% sure the physical connection is solid.
To help streamline this process, here's a quick checklist to run through.
Initial Diagnostic Checklist for LaCie Drives
This table serves as a quick reference guide to systematically check for the most common and easily fixable LaCie hard drive issues before proceeding to more complex solutions.
| Symptom | Potential Cause | Quick Fix Action |
|---|---|---|
| No power/light | Faulty power adapter or outlet | Try a different wall outlet; check for a lit LED on the power brick. |
| Drive not appearing | Bad USB/Thunderbolt cable or port | Swap the cable with a new one; try all other ports on the computer. |
| Intermittent connection | Loose cable or faulty hub | Plug directly into the computer; ensure all connections are snug. |
| No activity sounds | Power or connection issue | Verify power adapter is working and cable is securely connected. |
Running through these basic checks first will save you a ton of time and stress.
Look for Signs of Life
Even if the drive doesn't show up on your desktop, your computer might still see it on a deeper level. This is a critical diagnostic step.
On Windows, open Disk Management (just right-click the Start button to find it). Scan the list for a disk that matches the capacity of your LaCie. If you see it there—even if it's marked as "unallocated" or "raw"—that's fantastic news. It means the hardware is probably okay, and you're likely dealing with a software or filesystem problem.
For macOS users, the tool you need is Disk Utility, found in your Applications > Utilities folder. Look for your LaCie drive in the sidebar on the left. If it appears, even if it's grayed out and unmounted, the system is recognizing the hardware.
Key Insight: Seeing your drive in Disk Management or Disk Utility is the single most important sign at this stage. It tells you the core electronics are working and you can shift your focus from hardware to filesystem recovery.
Interestingly, a lot of so-called "LaCie drive failures" aren't due to the internal Seagate disk at all. The culprit is often the electronics inside the enclosure itself. There are well-documented cases among audio pros on forums like Gearspace.com where entire batches of LaCie D2 drives failed to mount. The solution? Technicians simply shucked the drives from the faulty LaCie cases, put them in a new enclosure, and recovered all the data instantly. This history is exactly why these external checks are so important—the problem might just be the box, not what’s inside it.
Using Your Computer’s Built-In Tools to Repair Your LaCie Drive
Alright, you've swapped cables, tried different ports, and confirmed the drive has power. If your LaCie is still giving you the silent treatment, it's time to stop looking at the hardware and start thinking about the software.
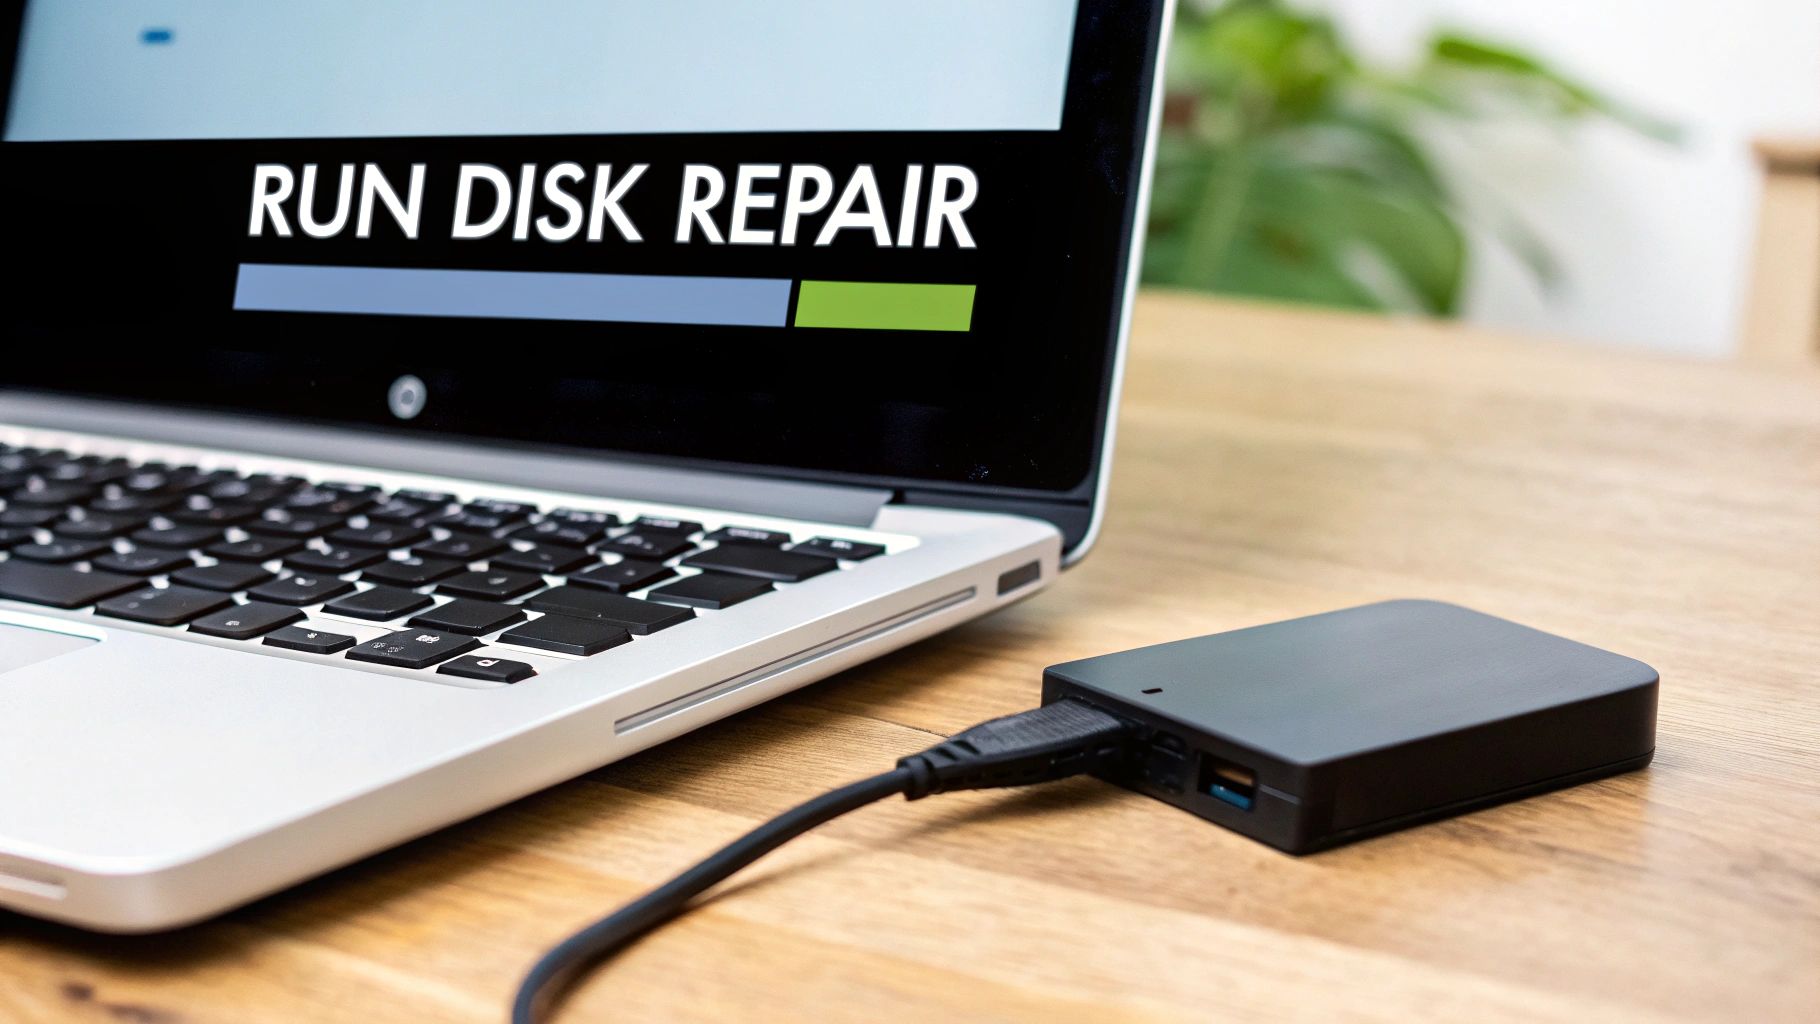
More often than not, the problem isn't a physical failure but a logical one—the drive's internal filing system (the filesystem) has become jumbled or corrupted. This sounds serious, but thankfully, both macOS and Windows come with powerful, free utilities designed to fix exactly these kinds of messes. Before you even think about paid software, these built-in tools are your best first stop.
For Mac Users: Running First Aid in Disk Utility
On a Mac, your troubleshooting toolkit starts with Disk Utility. This is a surprisingly powerful app that can untangle a wide variety of common drive errors. The best-case scenario is that your LaCie drive shows up in the Disk Utility sidebar, even if it's grayed out. That means the Mac can see it, which is half the battle.
Inside Disk Utility, the feature you're looking for is First Aid.
- First, open Disk Utility (you can find it in Applications > Utilities, or just search for it).
- In the left-hand panel, click on your LaCie drive. Be sure to select the parent drive icon, not the indented volume name below it.
- Click the First Aid button in the top toolbar and hit Run.
Disk Utility will now meticulously scan your drive's partition maps and file structures for errors. This can take a while—anywhere from a few minutes to over an hour, depending on the drive's size and the extent of the damage. Let it run its course without interruption.
A green checkmark at the end means it found and fixed errors. In many cases, this simple step is all it takes to get your LaCie mounting and working again.
If First Aid reports that it found errors it can't repair, don't give up just yet. Run it a second or even a third time. I've seen it fix complex, layered issues incrementally. If it still fails after a few tries, the corruption might be too severe for it to handle, and we'll need to look at more advanced options.
For Windows Users: Putting Check Disk (CHKDSK) to Work
On the Windows side, you have an old-school but incredibly effective tool called Check Disk, better known as CHKDSK. It runs from the command line, so there's no fancy interface, but it's a beast at finding and fixing filesystem errors and flagging bad sectors.
To get started, you need to know the drive letter assigned to your LaCie. Open File Explorer and look for it (e.g., F:, G:).
Next, you need to open Command Prompt with elevated privileges.
- Click the Start button and type
cmd. - Right-click on Command Prompt in the results and choose Run as administrator.
In the black Command Prompt window, you'll type the command. The most powerful version for a full repair scan is chkdsk /f /r [your drive letter]:. So, if your LaCie is the F: drive, you'd type:
chkdsk /f /r F:
Let's quickly break down those little switches:
/fis the crucial one—it tells CHKDSK to fix any errors it finds./rtells it to locate bad sectors and recover any readable information from them. This makes the scan much more intensive, but it's absolutely worth doing.
Press Enter, and the scan will begin. Be patient, as this can take a very long time, especially with the /r parameter. Do not close the window or turn off the computer.
Why This Command Works: The
/rswitch is what makes this a true diagnostic tool. It goes beyond simple file errors and physically scans the drive's surface for damage. This is often the key to fixing a LaCie drive that has become slow, unreliable, or randomly disconnects.
When it's done, CHKDSK will give you a summary. If it found and fixed errors, that's great news—try accessing your files again. If it reports a large number of bad sectors or unfixable errors, this is a strong sign the drive may be physically failing. At this point, your top priority should be to back up whatever data you can still access immediately.
Advanced Data Recovery You Can Do Yourself
So, you've run First Aid or CHKDSK, and they’ve thrown their hands up, reporting errors they can't fix. This is a critical moment. Your next move is probably to reach for more powerful, third-party recovery software, but this is also where a simple mistake can turn a recoverable situation into a permanent data graveyard.
Let me be crystal clear about the single most important rule in data recovery: never work directly on a failing drive. A deep scan from a recovery tool is an incredibly intense process. It forces the drive to read every single sector, putting a huge amount of stress on already delicate mechanical parts. For a struggling LaCie drive, that stress can be the final nudge that sends it over the edge into complete, unrecoverable failure.
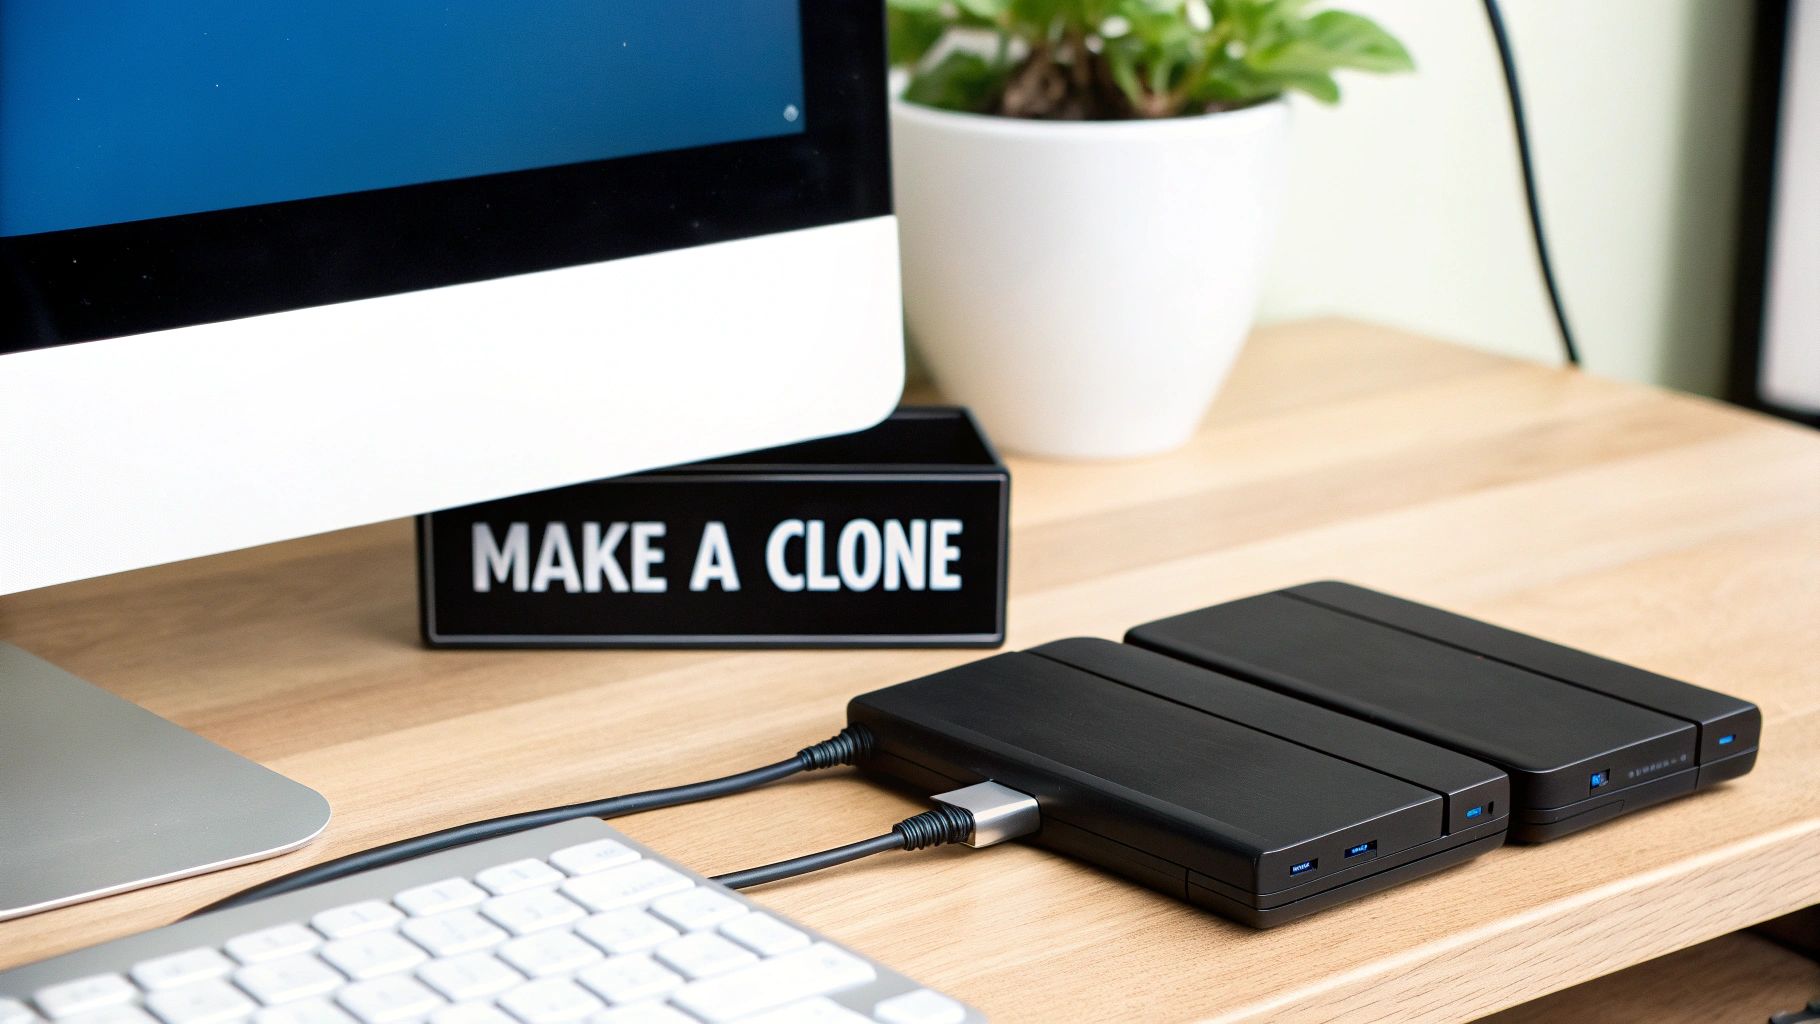
To do this safely, you need to adopt the same core principle that every professional lives by. You must first create a perfect, byte-for-byte clone—often called a disk image—of the failing drive.
The Power of a Disk Image
A disk image is an exact digital copy of your LaCie drive. It captures everything—the corrupted filesystem, the lost files, even the empty space. Creating this image is a much gentler process than a recovery scan because it typically reads data sequentially, which minimizes the kind of stressful, back-and-forth head movements that can kill a damaged drive.
Once that image is created and saved to a separate, healthy drive, you can put the original LaCie drive on a shelf and forget about it. From now on, you’ll perform all your recovery attempts on this risk-free clone.
- It preserves the original drive: If a recovery scan messes up or corrupts the clone, who cares? You can just make a new clone from your original LaCie drive and try a different tool or approach.
- It gives you a stable environment: The clone lives on a known-good drive, so you don’t have to worry about the hardware dying in the middle of a scan.
- It's the professional standard: This is exactly how data recovery labs work. They never touch a client's original media more than is absolutely necessary to create a stable image.
Tools like Disk Drill (for Mac and Windows) and EaseUS Data Recovery Wizard (great for Windows) have this cloning feature built right in. Look for options like "Byte-to-Byte Backup" or "Create Image."
Expert Tip: To create the image, you need another drive with free space equal to the total capacity of your LaCie drive, not just the amount of data on it. For a 4TB LaCie, you need a 4TB (or larger) destination drive.
Choosing the Right DIY Recovery Software
Once you have your disk image safely stored, you can mount it as a virtual drive and point your recovery software at it. The market is flooded with these tools, but a few have consistently proven their worth in the field.
Recommended Tools:
- Disk Drill: My go-to for its clean interface and powerful scanning algorithms. It supports a massive range of file types and, crucially, includes the disk imaging feature.
- EaseUS Data Recovery Wizard: A long-time player in the game, respected for its robust recovery and straightforward, guided process.
- PhotoRec: This one is a powerhouse, and it's free. The command-line interface isn't for everyone, but its ability to ignore the filesystem and carve raw file data makes it incredibly good at finding photos, videos, and documents on severely corrupted drives.
No matter which tool you pick, the workflow is pretty much the same. You'll tell the software to scan your disk image, and after a while, it will show you a list of what it found. From there, you can preview the files and save them to yet another separate, healthy drive.
Be warned, real-world data recovery is often a slow, painstaking process. One documented case involved a 2TB LaCie Thunderbolt drive with both bad sectors and hardware failure. An initial six-hour pass recovered about 500GB before hitting a wall of errors. It took a second, five-hour session to pull another 502GB of critical financial data off the drive. You can see the full breakdown of this challenging LaCie data recovery scenario on dfwci.com. It’s a great example of why patience and a safe, methodical approach are everything.
If the data you're trying to save includes highly sensitive information—like the private keys for a crypto wallet—the stakes are infinitely higher. In this scenario, creating a clone isn't just a best practice; it's an absolute must to prevent catastrophic loss. For anyone facing that high-pressure situation, there's specialized guidance on recovering crypto wallets from a failing hard disk that follows these same safety-first principles.
Recognizing the Signs of Physical Drive Failure
Sometimes, the problem isn't a simple software glitch or a bad cable. The drive itself is just… dying. When your LaCie drive is suffering from a physical failure, no amount of fiddling with CHKDSK or Disk Utility is going to help. In fact, it will make things worse.
Learning to spot the tell-tale signs of a mechanical breakdown is the single most important skill you can have. It’s the difference between a recoverable situation and a coaster full of lost memories.
The line between a software error and a hardware failure can feel a bit blurry at first. But some symptoms are massive red flags. If your computer freezes solid the instant you plug in the drive, or if the drive connects and disconnects over and over again on its own, you've got a serious problem. This isn't just a glitch; it’s the internal components struggling to stay alive, and every second it's plugged in is a gamble.
If you see this happening, your first and only move is to unplug the drive immediately.
The Sounds of a Dying Drive
Often, the most undeniable proof of a physical failure is something you hear, not see. A hard drive is a delicate piece of machinery, and when its moving parts begin to fail, they make some truly awful noises.
Listen closely for any of these sounds:
- Clicking or Ticking: This is the infamous "click of death." It's the sound of the read/write heads desperately trying to find the data tracks on the platters. When they can't, they snap back to their starting position, over and over, creating a rhythmic, fatalistic click.
- Grinding or Scraping: This is one of the worst sounds you can possibly hear from a drive. That harsh, metallic grinding usually means the read/write heads have crashed directly onto the magnetic platters, physically scraping away the surface that holds your data.
- High-Pitched Whirring or Screeching: A piercing whine or screech points to a seized spindle motor. That motor is supposed to spin the platters at thousands of RPMs, and if it's frozen, the drive is completely dead in the water.
These sounds are the drive’s final cry for help. Trying to run software on a drive making these noises is not only useless, it's actively destructive.
The Golden Rule of Physical Failure: The instant you suspect a physical problem—especially if you hear clicking or grinding—unplug the drive and stop. Do not plug it back in. Do not run any more software. Your next call should be to a professional data recovery service.
Why LaCie Drives May Be More Vulnerable
It helps to know what’s actually inside your drive. LaCie is known for its beautiful enclosures, but the hard drives inside are made by other companies—primarily Seagate. This matters because, over the years, Seagate drives have developed a reputation for having higher failure rates than their competitors.
Data recovery pros who have handled thousands of drives will tell you the same thing: they see far more failed Seagate drives than those from Toshiba or Western Digital. One veteran technician I know said he's seen more dead Seagates than all other brands combined. Because LaCie uses these components, their drives unfortunately inherit that risk. You can dig into the long-term statistics yourself by reading the research on Backblaze's blog. This makes it even more critical to recognize those physical failure signs early.
Differentiating Software vs. Physical Symptoms
Trying to figure out what's wrong can be stressful. Here’s a quick table to help you distinguish between software-based errors you might fix at home and physical failure symptoms that are a hard stop.
Software vs. Physical Failure Symptoms
| Symptom | Likely Cause (Software/Logical) | Likely Cause (Physical/Hardware) |
|---|---|---|
| Drive Not Mounting | Filesystem corruption, partition map error | Failed read/write heads, seized motor |
| Files Are Missing | Accidental deletion, virus, formatting | Bad sectors, platter damage |
| System Sluggishness | Minor file corruption, fragmentation | Failing drive controller, extensive bad sectors |
| Strange Noises | (None) | Clicking, grinding, high-pitched whirring |
| Computer Freezes | Severe filesystem corruption | Major hardware failure, short circuit |
Knowing which column your symptoms fall into is the key. It tells you whether you can keep trying DIY fixes or if it's time to stop everything and call in the experts to save your data.
Knowing When to Call a Professional Recovery Service
Knowing your limits is probably the most important skill in this entire process. You can run all the software fixes in the world, but there’s a hard line where DIY attempts stop being helpful and start becoming actively dangerous to your data. Cross that line, and a recoverable drive can easily become a paperweight.
The decision to stop and call a professional isn't a sign of failure—it’s a sign of wisdom. If you’ve worked through the software solutions we’ve covered and are still staring at a dead drive, it’s time to pause. But if you run into certain specific, severe symptoms, the decision is already made for you.
Red Lines You Must Not Cross
Some situations take the DIY option completely off the table. These are the scenarios where continuing to power the drive, even for a few seconds to "just check," can cause catastrophic physical damage.
- Physical Trauma: If you’ve dropped your LaCie drive, knocked it off a desk, or it’s taken any kind of hard hit, do not plug it in. The internal mechanics are incredibly delicate. An impact can easily misalign the read/write heads, and powering it on could cause them to gouge the platters where your data lives.
- Water or Fire Damage: This one’s a no-brainer. Exposure to liquid or extreme heat is an immediate "hands-off" situation. Powering on a water-damaged drive is a surefire way to cause short circuits that will fry the logic board and potentially corrupt the platters beyond recovery.
- The "Click of Death": If your drive starts making any unusual noises—especially a rhythmic clicking, grinding, or scraping sound—unplug it immediately. That's the sound of mechanical failure. Every click is the sound of the heads struggling, potentially scratching your data away with each pass.
If you encounter any of these, your DIY journey is over. The drive is physically compromised, and only a specialist with the right tools can safely proceed.
Critical Takeaway: Physical damage or strange noises aren't suggestions—they are stop signs. The single best thing you can do for your data in these situations is to power down the drive and not touch it again.
What Professionals Can Do That You Can't
So, what’s the magic that happens at a professional data recovery lab? It comes down to their environment, their tools, and their deep expertise. The biggest advantage is a certified cleanroom, a controlled space that is literally thousands of times cleaner than a typical room.
Hard drive platters are so sensitive that a single speck of dust can cause the read/write heads to crash, destroying data on impact. A cleanroom allows a technician to safely open your LaCie drive and perform what is essentially microsurgery. For a deeper dive, you can learn more about why cleanroom environments are non-negotiable for data recovery on walletrecovery.ai and see why this is a must for any physical repair.
Inside this sterile space, technicians can:
- Replace Failed Components: They can swap out dead read/write heads, faulty spindle motors, or fried controller boards using parts from an identical donor drive.
- Transplant Platters: In a worst-case scenario, they can physically move the data-holding platters from your damaged LaCie into a functional donor drive.
- Use Specialized Hardware: They have advanced tools that can communicate directly with the platters, completely bypassing the drive's own broken electronics to pull the data off.
The Cost-Benefit Analysis
Let’s be honest: professional data recovery isn’t cheap. It can easily run from several hundred to a few thousand dollars. This is where you have to do a sober assessment of the value of your data. If the drive just held some movies you can download again, it’s probably not worth it.
But when the stakes are high, the math changes completely.
If that LaCie holds a decade of irreplaceable family photos, the only copy of your doctoral thesis, or mission-critical business records, the cost of recovery suddenly looks like a sound investment. This is especially true for high-value digital assets. If your drive contains the private keys to a crypto wallet with significant funds, paying for professional recovery is the only logical choice. It’s a straightforward business decision to protect a far more valuable asset and maximize the odds of getting it back.
LaCie Drive Repair: Your Questions Answered
When your LaCie drive starts acting up, you’re bound to have questions. It’s a stressful situation, especially with important files hanging in the balance. Let’s clear up some of the most common things people ask when they run into trouble.
I Accidentally Formatted My LaCie Drive. Is the Data Gone Forever?
Not necessarily! In most cases, you can get data back from a drive you’ve accidentally formatted. The absolute most important thing you can do is stop using the drive immediately.
Think of formatting as ripping the table of contents out of a book. The pages (your data) are still there, but the system no longer knows where to find them. Your files are only truly gone once they're overwritten with new data. To have a shot at recovery, you'll need to run a dedicated software tool from a different computer to scan the drive. This keeps you from accidentally writing new information over your old files.
My LaCie Drive Is Making a Clicking Noise. What Does That Mean?
That rhythmic clicking sound is one of the worst things you can hear from a hard drive. It's often called the "click of death" for a reason. That noise is the internal read/write heads desperately trying—and failing—to find their proper position, snapping back and forth.
Critical Warning: If you hear any clicking, grinding, or buzzing, unplug the drive right away. Don't be tempted to power it on "just one more time." Every second it runs, you risk the heads physically scraping the platters, which can turn a recoverable drive into a coaster. This is a job for a professional cleanroom service, period.
How Do I Stop My LaCie Drive from Failing in the First Place?
You can't make a drive last forever, but you can definitely stack the odds in your favor and protect your data with some smart habits. Being proactive is your best defense.
- The 3-2-1 Backup Rule is Your Friend: Always keep three copies of your data on two different types of media, with at least one copy stored somewhere else entirely (like a cloud service).
- Treat It Gently: External drives really don't like being dropped or banged around, especially when they're running. A little bit of care goes a long way.
- Let It Breathe: Overheating is a silent killer for electronics. Make sure your drive has some space for airflow and isn't crammed into a hot cabinet.
- Always Eject Safely: Before yanking the cable, use the "Safely Remove Hardware" (Windows) or "Eject" (macOS) option. This ensures the drive has finished writing everything, which prevents file corruption.
It's also worth remembering that LaCie drives, like any brand, can have components with known reliability issues. It's always a good strategy to treat your external drive as a secondary backup or a transport device, not the only home for your most critical files. That way, if it does fail, it’s an inconvenience, not a catastrophe.
If that drive holds something incredibly sensitive, like crypto assets, the stakes get a whole lot higher. For specialized help recovering wallets from failing or compromised drives, the team at Wallet Recovery AI offers secure and confidential services built to get your assets back without putting your information at risk. You can find out more at https://walletrecovery.ai.
Leave a Reply