
That sudden, sinking feeling when your Mac boots to a flashing folder with a question mark is something you don't forget. Instead of your familiar desktop, you're met with a stark icon that signals a serious problem. It’s your Mac’s way of shouting, "I can't find the operating system!"—leaving all your files, and more importantly, your crypto wallets, stuck in limbo.
So, What Does The Blinking Folder Really Mean?
Think of this screen as a critical disconnect between your Mac's brain (the logic board) and its memory (the startup disk). The machine has power, but it has no idea where to find the essential software—macOS—that brings it to life. It's like a pilot in a cockpit full of powered-on instruments who has lost the flight plan.
Digging into the Common Causes
This startup failure isn't caused by just one thing. It can be anything from a simple software hiccup to a full-blown hardware meltdown. Pinpointing the likely culprit is the first step to figuring out how to fix it.
- Wrong Startup Disk: Sometimes, it’s just a case of amnesia. After a software update or if you’ve been using an external drive, your Mac can simply forget which disk holds macOS.
- Corrupted System Files: A power outage during an update, a buggy app, or even malware can scramble the core files your Mac needs to boot. The system is there, but it's unreadable.
- Bad Hard Drive Cable: I've seen this one countless times, especially on older MacBook Pros. The internal SATA cable that connects the drive to the logic board can wear out and fail. The drive is perfectly healthy, but the Mac can't communicate with it.
- Failing Hard Drive or SSD: This is the worst-case scenario. If your storage drive is physically failing or has reached the end of its life, it becomes a paperweight. Your Mac can't read anything from a dead drive.
To give you a quick reference, here's a table to help you match your situation to a likely cause and the right first move.
Quick Diagnosis: Common Causes and First Steps
| Symptom | Potential Cause | Recommended First Action |
|---|---|---|
| Error appeared after a macOS update or using an external boot drive. | Incorrect Startup Disk Selection | Boot into Startup Manager and re-select your internal drive. |
| The Mac shut down unexpectedly before the error appeared. | Corrupted System Files | Boot into Recovery Mode and run Disk Utility's First Aid. |
| You have an older MacBook Pro (pre-2016) and the drive works in an external enclosure. | Hard Drive Cable Issues | Replace the internal SATA cable (a common and inexpensive repair). |
| The drive makes clicking/grinding noises, or it's not visible in Disk Utility at all. | Failing Hard Drive or SSD | Stop immediately. Do not attempt further fixes. Contact a professional. |
This table should help you triage the problem, but remember, if you suspect a physical drive failure, powering it on repeatedly can make things worse.
Why This is a Code Red for Crypto Holders
For anyone holding cryptocurrency, this screen is more than just an annoyance—it's a direct threat to your assets. Your wallet files, whether from Exodus, Electrum, or Atomic Wallet, are sitting on that drive. If you can't get to the drive, you can't get to your keystores and private keys. They're locked in a digital vault with the door welded shut.
The blinking question mark folder is a nightmare that has plagued Apple users for decades. In the crypto world, it symbolizes inaccessible keystores for apps like Electrum or MyEtherWallet that can hold life-changing fortunes. An estimated 19% of Bitcoin's total supply, roughly 3.7 million BTC, is considered lost forever due to issues like corrupted drives—exactly the kind of problem this error represents. Discover more insights about lost digital assets and recovery efforts from Business Insider.
This scenario is precisely why having a solid recovery plan is non-negotiable. When your Mac won't boot and your drive is inaccessible, you have to shift gears into data recovery mode. Before you start running commands that could overwrite your precious data, taking a moment to understand how to approach a potential hard disk failure is the most important first step you can take.
Your First Steps to Fix The Startup Issue
Seeing that blinking question-mark folder is enough to make anyone's heart sink. But don't panic. Before you jump to the worst-case scenario (a dead hard drive), let's walk through a few simple, non-destructive steps that often resolve the problem in minutes.
More often than not, this is just a software hiccup where your Mac has temporarily forgotten where to find its operating system.
This flowchart gives you a high-level view of the two paths we're about to explore: a simple boot configuration issue or a more serious hardware problem.

The goal here is to first rule out the easy stuff. Your first actions will tell you whether you're dealing with a confused Mac or a failing drive, which dictates everything that comes next.
Reset Your Mac's NVRAM or PRAM
Think of NVRAM (Non-Volatile Random-Access Memory) as your Mac's short-term memory for core settings. It holds onto details like your selected speaker volume, screen resolution, and—most importantly—your startup disk selection. If this data gets corrupted, your Mac gets amnesia and can't find macOS.
Resetting it is completely safe, doesn't touch your personal files, and is one of the oldest tricks in the Mac troubleshooting book for a reason.
For Intel-based Macs:
- Shut down your Mac completely. A restart won't cut it.
- Press the power button, then immediately press and hold these four keys: Option + Command + P + R.
- Keep them held down for about 20 seconds. On older Macs, you might hear a second startup chime. On newer ones with the T2 Security Chip, you'll see the Apple logo appear and disappear twice.
- Let go of the keys and allow your Mac to boot normally.
If the blinking folder is gone, you just fixed it. Your Mac simply needed a quick reminder of where to look for its operating system.
For Apple Silicon Macs (M1, M2, M3):
These modern Macs handle things differently. There's no manual key combination to reset NVRAM; the system automatically runs a check and resets parameters if needed during every boot. If you have an Apple Silicon Mac, you can just skip this and move on to the next step.
Manually Select the Startup Disk with Startup Manager
If the NVRAM reset didn't do the trick, the next step is to manually tell your Mac which drive to boot from. This is a common issue if you've recently installed macOS from a USB stick or used an external drive. The Startup Manager is your tool for this job.
Getting there requires a specific key press right at startup.
How to Access Startup Manager:
- On an Intel Mac: Shut it down. Press the power button, then immediately press and hold the Option (⌥) key.
- On an Apple Silicon Mac: Press and hold the power button until you see the "Loading startup options" screen.
Once you're in, you should see icons for any bootable drives your Mac can find. Hopefully, your main internal drive (usually named "Macintosh HD") is on that list.
Pro Tip: If you see your startup disk here, breathe a huge sigh of relief. This is great news. It means your drive isn't dead—it's just a software configuration problem. The hardware is working and communicating, which is half the battle.
Use your mouse or arrow keys to select your main drive, then click the arrow to continue. If your Mac boots up successfully, we're almost done. Now you just need to make that choice permanent.
Setting the Default Startup Disk for Good:
Once you're logged back into macOS, you need to lock in that setting.
- Open System Settings (or System Preferences on older macOS versions).
- Navigate to General > Startup Disk.
- You'll see your drive's icon there. Click it to select it. You might need to click the lock and enter your password first.
- Click Restart to save the new default.
This tells your Mac to use that drive every single time, so you shouldn't see that dreaded blinking folder again. If your drive didn't show up in Startup Manager at all, it's time to dig a little deeper with more advanced tools.
Using macOS Recovery to Repair Your System
If resetting the NVRAM didn't do the trick, it’s time to bring out the big guns. Every modern Mac comes with a built-in emergency toolkit called macOS Recovery. This is a special, hidden partition on your drive that runs completely separate from your main operating system, giving you the power to perform deep-level repairs even when your Mac refuses to boot.
Think of it as your Mac’s own personal emergency room. It creates a stable environment with just the essential tools you need to diagnose and fix the very problems causing the startup failure. For anyone with critical files they can't lose—like crypto wallet keystores—this is the next logical, and safest, step in the process.
Booting Into The macOS Recovery Environment
Getting into this powerful mode requires a specific key combination during startup, and it’s different depending on what kind of chip is in your Mac. It’s crucial to get this right.
- For an Intel-based Mac: Shut down your Mac completely. Press the power button, then immediately press and hold Command (⌘) + R. Keep holding those keys until you see the Apple logo or a spinning globe.
- For an Apple Silicon Mac (M1/M2/M3): This is a bit different. Press and hold the power button until the "Loading startup options" screen appears. From there, just select Options and click Continue.
Once it loads, you’ll see a simple window with a few "macOS Utilities." This is your command center for system repair. Don't stress—you haven't changed anything yet. Just getting to this screen is a good sign that your Mac's core hardware is working. Our first stop is Disk Utility.
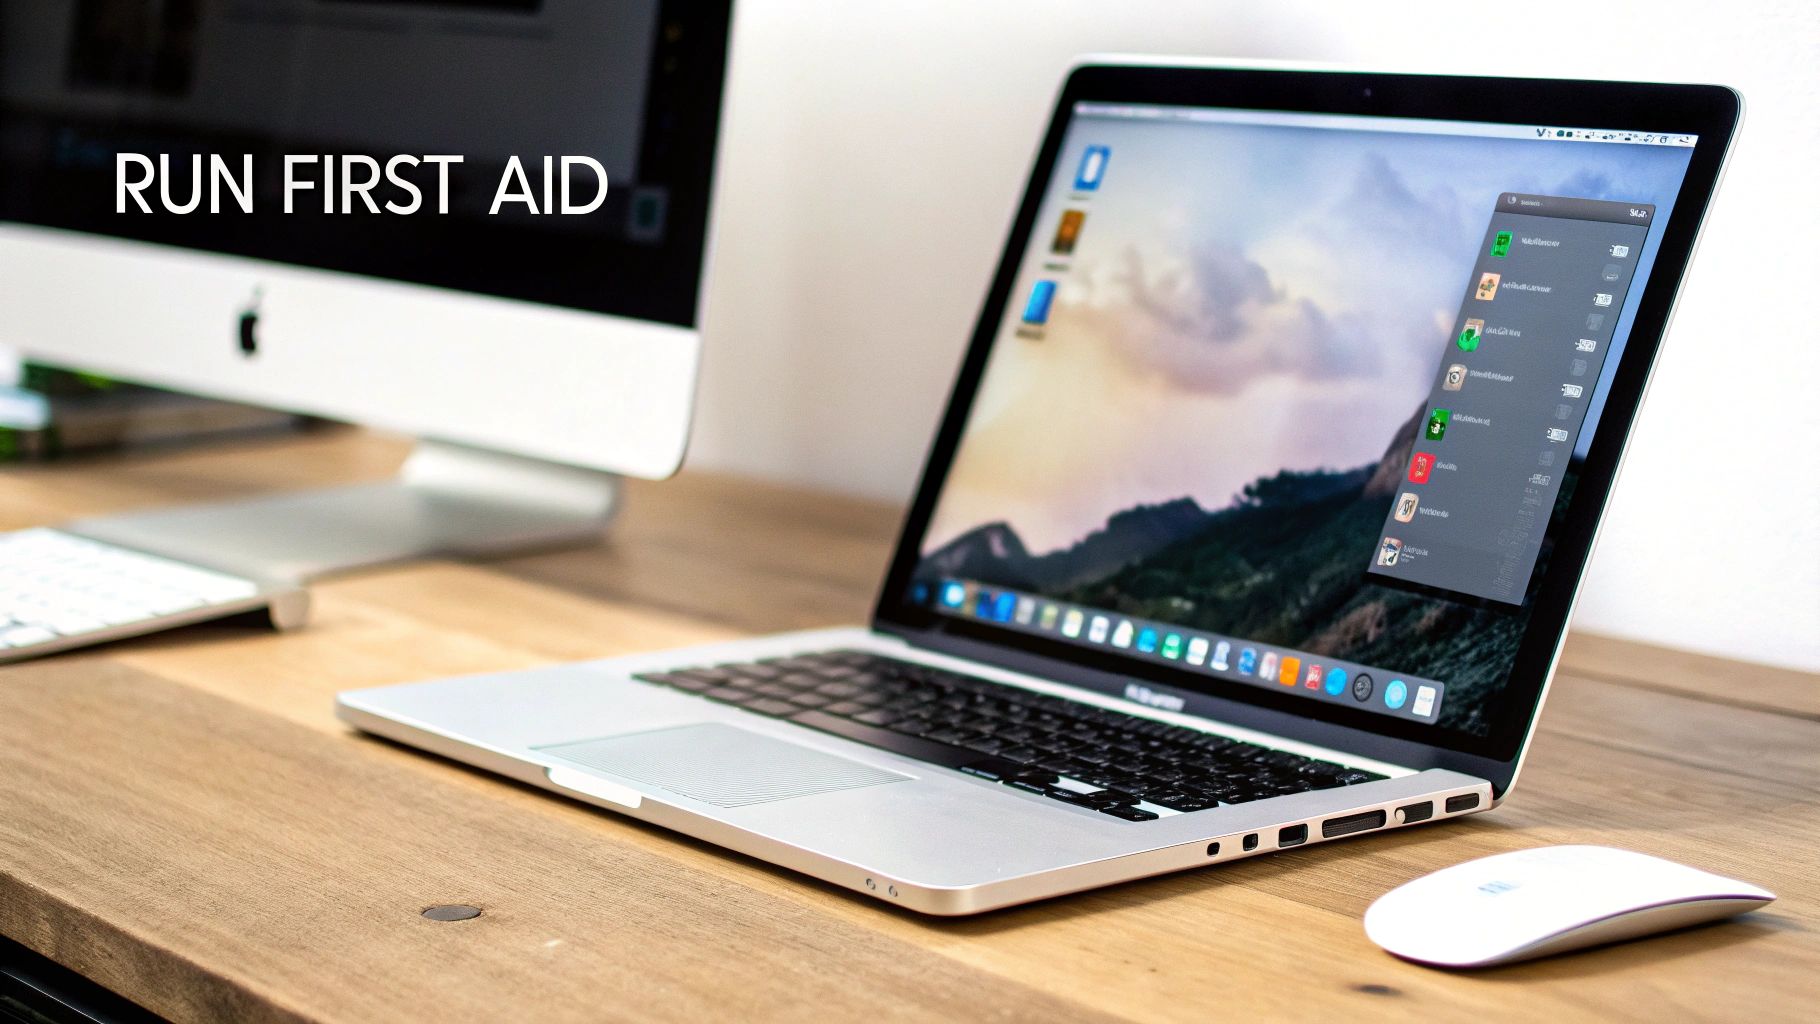
Using Disk Utility to Run First Aid
At the heart of many startup problems, including that dreaded blinking folder, is file system corruption. Your data might be perfectly fine, but the "address book" that tells macOS where to find everything has gotten scrambled. Disk Utility's First Aid is designed specifically to find and fix these kinds of logical errors.
Here's how to diagnose your drive:
- From the macOS Utilities window, select Disk Utility and click Continue.
- In the top-left corner of the Disk Utility window, click the View menu and select Show All Devices. This is a critical step; it lets you see the physical drive itself, not just the volumes created on it.
- Choose your main internal drive from the sidebar. It's usually named something like "Apple SSD" or will have a brand name like Hitachi or Samsung.
- Click the First Aid button in the toolbar and then click Run.
Disk Utility will now kick off a full scan of your drive's partition maps and file structures. This can take anywhere from a few minutes to over an hour, so be patient and let it do its thing.
If First Aid finishes and reports "The volume appears to be OK," that's fantastic news. It means your drive's structure is sound, and the problem is likely with the OS installation itself. But if it reports errors it can't fix, you're probably looking at more severe data corruption or a physically failing drive.
If First Aid gives you the all-clear but the blinking folder is still there, it means the next powerful tool in macOS Recovery is our best bet.
Reinstalling macOS Without Losing Your Data
When Disk Utility says your drive is healthy but your Mac still won't boot, the operating system itself is likely the culprit. The solution is to reinstall macOS. I know that sounds drastic, but doing a standard reinstall from Recovery Mode is a non-destructive process.
It works by replacing all the core system files of macOS while leaving your personal files, applications, settings, and—most importantly—your wallet data completely untouched. It’s like rebuilding a car's engine without touching a single thing in the glove box.
To do this safely:
- Make sure you're connected to the internet. You'll see a Wi-Fi icon in the top-right corner. The installer needs to download the macOS files directly from Apple.
- Back in the main macOS Utilities window, choose Reinstall macOS (the name might be slightly different, like "Reinstall macOS Sonoma").
- Follow the on-screen instructions. When it asks where to install, pick your normal startup disk, which is almost always named "Macintosh HD".
Crucially, do not erase the disk. The standard "Reinstall macOS" option is specifically designed to preserve all your user data. The whole process can take a while, so make sure your MacBook is plugged into its charger.
Once the installation is done, your Mac should restart into the familiar setup screen and then your login window. This one move resolves a massive percentage of software-related startup failures and is often the final step you need to get rid of that blinking question mark folder for good.
When Disk Utility hits a dead end or a full macOS reinstall is off the table, it’s easy to feel like you’re out of options. But you're not. At this point, the mission changes: stop trying to fix the Mac and start focusing on rescuing your files.
This is where we get a bit more creative. We’re going to sidestep the broken operating system completely.
Think of it like a digital rescue operation. By treating your Mac's internal drive as just an external hard drive, we can get a direct line to your critical wallet files and everything else you need to save.
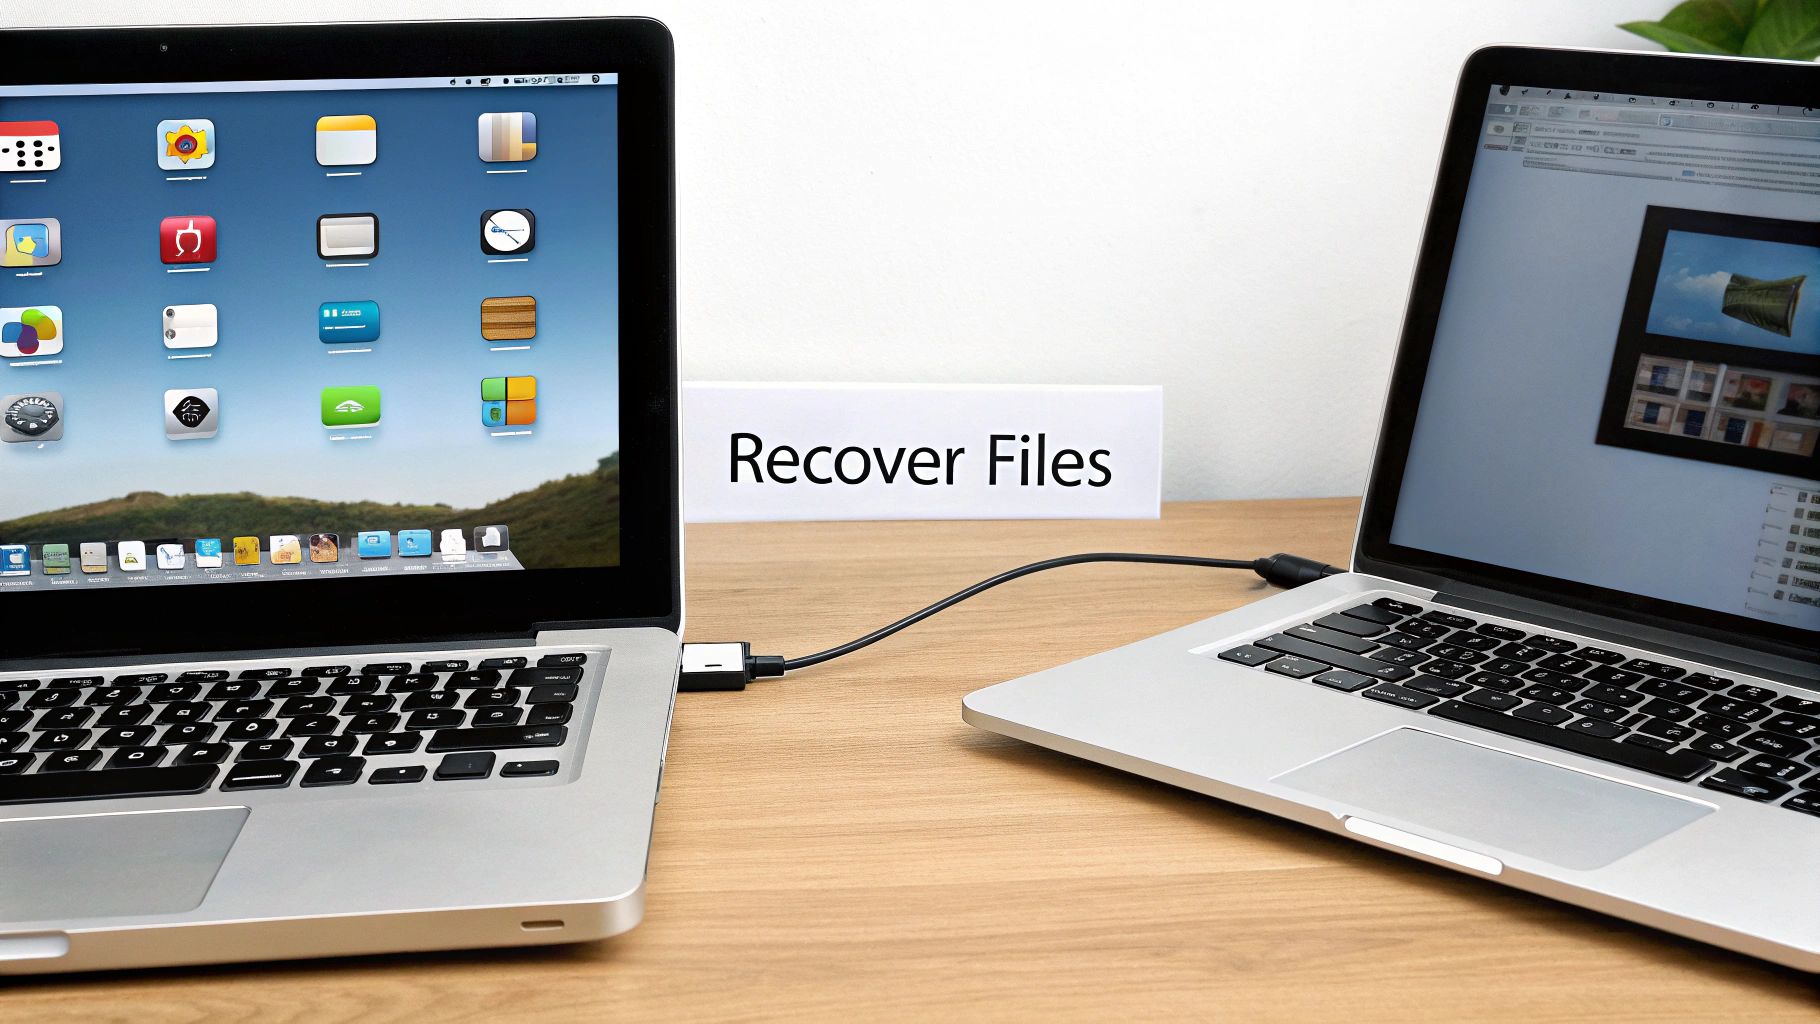
Using Target Disk Mode for Direct Drive Access
Target Disk Mode is one of those clutch features that most people forget exists until they desperately need it. It’s a lifesaver. This mode turns your non-booting Mac into a glorified external hard drive that you can plug into another working Mac.
Once connected, you get full access to the file system. No more error screens—just folders you can open and files you can drag and drop to safety.
To pull this off, you’ll need three things:
- The Problem Mac: The one with the blinking question mark.
- A Healthy Mac: Any other Mac will do.
- The Right Cable: This is critical. You need a Thunderbolt 3 (USB-C) or Thunderbolt 2 cable. Your standard USB charging cable won't work.
The process itself is surprisingly straightforward. First, connect the two Macs with the correct cable. Shut down your problem Mac completely. Now, press the power button and immediately press and hold the T key. Don't let go until you see a big Thunderbolt icon pop up on the screen.
In a few moments, your broken Mac’s internal drive should appear on the healthy Mac's desktop, just like any other USB drive. Now the real work begins.
Finding Your Hidden Crypto Wallet Files
With access restored, it’s time to hunt for your wallet files. This can be tricky because most wallets hide their data in obscure Library folders for security. You won’t find them sitting in your Documents folder.
On the healthy Mac, open the drive from your problem Mac. Navigate this path: Users -> Your Username (e.g., JohnAppleseed). Now for the magic trick—revealing the hidden Library folder.
With your user folder window open, go to the Finder menu bar at the top of the screen. Click Go, then press and hold the Option (⌥) key. You'll see "Library" suddenly appear in the dropdown menu. Click it.
Inside the Library, the most common spot for wallet data is the Application Support folder. Here’s a cheat sheet for where to look:
- Exodus: Search for a folder named
Exodus. - Electrum: Look for a folder called
Electrum. - MetaMask & Trust Wallet: These are usually buried in your browser's extension data. Look for a folder like
Google/Chrome/Default/Local Extension Settings/. The wallet folder itself will have a long, random string of characters as its name.
Crucially, copy the entire folder over to the healthy Mac or an external drive. Don't just grab a single file. You need the whole directory to ensure a successful recovery. If you’re dealing with a complex situation or feel out of your depth, professional data recovery options for crypto wallets can offer the specialized help you need.
Creating a Bootable macOS Installer
What if you don’t have a second Mac handy? All is not lost. The next best trick is creating a bootable macOS installer on a USB drive. This gives you a self-contained rescue environment—a fresh copy of macOS that runs entirely from the USB stick.
For this, you'll need to borrow a working Mac (a friend's or family member's) and have a USB drive with at least 16GB of space. You can download a macOS installer from the App Store and use a simple Terminal command to create the bootable drive.
Once it's ready, plug the USB into your problem Mac. Power it on while holding the Option (⌥) key (for Intel Macs) or holding down the power button (for Apple Silicon Macs) until you see the Startup Manager.
From there, select your USB installer as the startup disk. Instead of clicking "Install macOS," look for the Utilities menu at the top of the screen. You can launch Disk Utility to mount your internal drive or even use the Terminal to manually copy files to another external drive. It’s a powerful workaround when Target Disk Mode isn’t an option.
Knowing When to Call A Professional
There comes a point in any troubleshooting process where you have to weigh the risks. Going it alone is great, but there’s a fine line between a DIY fix and making things a whole lot worse. Pushing a failing drive too far is a recipe for permanent data loss.
Knowing when to throw in the towel isn't admitting defeat. It's the smartest move you can make to protect your files, especially if a crypto wallet is on the line.
The most serious red flag is a sound you should never hear coming from a computer. If your Mac starts clicking, grinding, or making any kind of whirring noise, that’s the death rattle of a mechanical hard drive.
Stop everything. Immediately. Shut the Mac down and don't even think about turning it back on. Every time you power it up, you risk the drive's internal heads physically scraping the platters and shredding your data for good.
When Software Fixes Hit a Wall
Even on a silent Mac (like one with an SSD), the software will tell you when it’s out of its depth. Apple’s built-in tools are surprisingly robust, but they’re not magic.
It's probably time to call in a pro if you've run into any of these dead ends:
- Disk Utility Gives Up: You run First Aid, and it spits back an error it "cannot fix." That's its way of telling you the file system corruption is too severe or the drive has bad sectors it can't handle.
- Your Drive Has Vanished: The internal drive doesn't show up in Disk Utility or when you hold down the Option key at startup. If the Mac itself can’t even see the hardware, no software trick is going to find it.
- Recovery Keeps Failing: You’ve tried to reinstall macOS, but the installation fails over and over, maybe with a cryptic error message. This is a classic sign the drive is too unstable to even write new files to.
The High Stakes of Crypto Recovery
If you’re trying to get a crypto wallet back, the stakes are completely different. A blinking question mark folder isn't just an inconvenience; it's a potential financial disaster waiting to happen. The potential loss of a wallet with real value changes the entire equation, making professional help a much more sensible first step.
This is where you need specialists. Crypto recovery services have brought back millions in assets from wallets like MetaMask and Electrum, with Bitcoin recovery being a common request. This isn't just a niche problem; research on the importance of professional crypto recovery shows just how widespread this issue is.
Professional data recovery isn’t about running a fancier version of software you could buy online. They work in certified clean-room labs, which allows them to physically open a failing drive without dust destroying it. They use forensic hardware to clone the drive platter by platter—something you absolutely cannot do at home.
When your digital assets are on the line, letting an expert handle it is the safest bet you can make.
Alright, let's ditch the AI-speak and rewrite this section with some real-world expertise. Here’s a version that sounds like it’s coming from someone who has actually been through this a few times.
6. The Best Fix Is a Good Defense: Proactive Steps to Protect Your Mac and Crypto
Getting your Mac back from the brink is a huge relief. But the real win is making sure you never end up in that stressful spot again, especially when your crypto is on the line. This is where you shift from triage to building a rock-solid safety net for your digital life. It’s not just about backups; it’s about a smart, layered strategy to protect you from the blinking question mark folder and a dozen other digital disasters.
First things first: Time Machine. If you’re a Mac user, this is your non-negotiable first line of defense. It’s built right into macOS, it’s dead simple to set up, and it quietly creates a complete history of your system on an external drive. If you aren’t using it, you’re basically driving without a seatbelt. Go set it up now.
Your Crypto Is Special—Treat It That Way
Time Machine is fantastic for your documents, photos, and applications. But when it comes to your crypto assets, you need a completely different playbook. Relying only on a Time Machine backup for your wallet keys is a rookie mistake that could cost you everything.
You need to think in terms of dedicated, offline copies of your most critical secrets.
- Protect Your Seed Phrase Above All Else: This is it. Your 12 or 24-word recovery phrase is the master key to your kingdom. It should never, ever exist as a digital file on your computer. Don't save it in Notes, a Word doc, or a cloud service like Dropbox. Write it down on paper (or better yet, stamp it into metal) and store it in at least two separate, secure physical locations.
- Create Air-Gapped Wallet Backups: For software wallets like Exodus or Electrum, the actual
wallet.dator equivalent file is also crucial. A great practice is to manually back this file up to an encrypted USB drive. This creates a physical, "air-gapped" copy that a hard drive failure or online attack simply can't touch.
Think of it like this: Time Machine is your home insurance policy—it covers the whole house if something goes wrong. Your offline seed phrase and wallet file backups are the actual deed and master keys, stored in a fireproof safe off-site. One protects the structure; the other proves you own it.
Simple Habits for a Healthy Mac
You don't need to be a tech genius to keep your Mac running smoothly. A few simple routines can help you catch problems long before they turn into a full-blown startup crisis. Think of it as the digital version of checking the oil and tire pressure in your car.
A great habit is to run Disk Utility’s First Aid on your main drive every couple of months. You can do this right from your desktop—no need to boot into Recovery Mode. It's a quick, non-invasive scan that finds and fixes tiny file system errors before they can grow into monsters.
Finally, be smart about software updates. Staying current is vital for security, but don’t jump on a major new macOS release the day it comes out. Give it a week or two. Let the early adopters find the bugs. A little patience can save you from a world of hurt and ensure your Mac—and your investments—remain safe and sound.
To make this even easier, here's a simple checklist to keep you on track.
Your Crypto Backup and Mac Health Checklist
Print this out or save it somewhere you’ll see it. Sticking to a simple routine is the single best way to prevent data loss and keep your Mac running smoothly for years to come.
| Action Item | Frequency | Why It's Critical |
|---|---|---|
| Verify Time Machine Backup | Weekly | Ensures your primary system backup is actually working and up to date. |
| Run Disk Utility First Aid | Quarterly | Catches and repairs minor disk errors before they become critical. |
| Update macOS & Apps (Wisely) | Monthly | Keeps your system secure, but wait a week after major releases. |
| Secure Seed Phrases (Offline) | On Wallet Creation | This is your ultimate safety net. It should never be stored digitally. |
| Backup Wallet Files (Encrypted USB) | After Major Transactions | Creates an air-gapped copy of your wallet data, safe from online threats. |
| Review Physical Backup Locations | Annually | Confirms your offline backups are still secure and accessible. |
Taking these small, consistent steps transforms you from being a potential victim of data loss to being fully prepared. It's the peace of mind that comes from knowing your digital life is truly secure.
Common Questions & Quick Answers
Will Reinstalling macOS Wipe Out My Crypto Wallet?
It's not supposed to. When you reinstall macOS from Recovery Mode, the process is designed to replace only the core system files, leaving your personal stuff—like documents, apps, and user accounts—right where you left them.
That said, there's always a slim chance something could go sideways. Before you even think about reinstalling the OS, you should absolutely back up critical files. Use Target Disk Mode to pull your wallet files off the drive and onto another Mac. Better safe than sorry.
Can I Get My Wallet Back If the Hard Drive Is Completely Dead?
If your drive is making those dreaded clicking or grinding sounds, stop what you're doing immediately. Powering it on again could be the final nail in the coffin, as the internal components could literally be scratching your data away. At this point, DIY recovery is off the table.
This is a job for the pros. Professional data recovery labs have clean rooms and specialized hardware to safely disassemble the drive and pull the data off the platters. It's not cheap, but if a valuable wallet is on the line, it's your only real shot.
Your Get-Out-of-Jail-Free Card
Remember, your seed phrase (or recovery phrase) is the master key to your crypto. If you have it, you don't need the wallet file from your dead Mac at all. It's the ultimate safety net.
Do I Even Need the Wallet File If I Have My Seed Phrase?
Nope! That seed phrase is your golden ticket. If you have it written down somewhere safe, you can skip all the drama. Just grab a new computer, install a fresh copy of your wallet software, and choose the "Restore from seed phrase" option. It will regenerate your private keys and give you full access to your funds. Honestly, it's the easiest way out of this mess.
Is Resetting the NVRAM or PRAM Going to Delete My Files?
Not at all. This is a totally safe troubleshooting step. Resetting the NVRAM/PRAM won't touch your personal files, apps, or documents. All it does is clear out a few low-level system settings—things like your speaker volume, screen resolution, and which disk your Mac starts from. It’s a common and harmless fix for that blinking question mark folder.
If you’ve run through all these steps and are still locked out of your critical assets, don't take any more chances. The experts at Wallet Recovery AI use advanced, non-destructive techniques to help you get back into locked or inaccessible crypto wallets.
Contact us for a confidential assessment and start your recovery process today.
Leave a Reply