
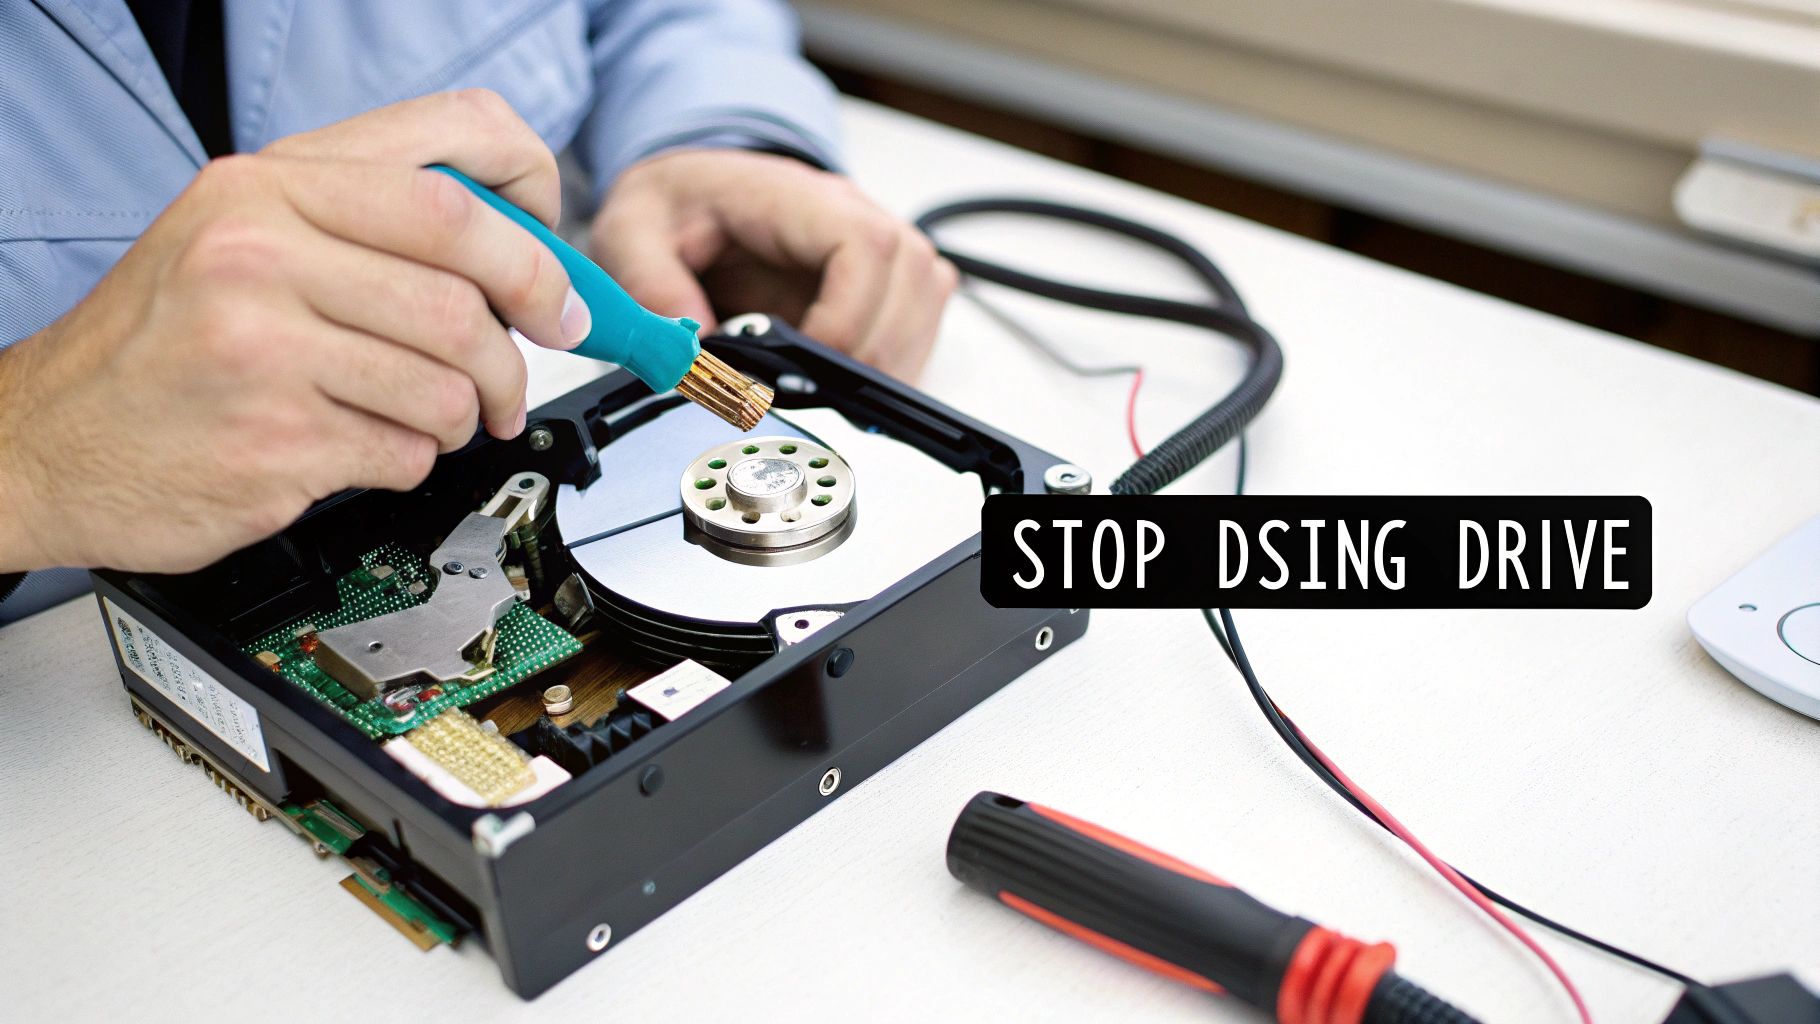
That moment your stomach drops—you just formatted the wrong drive. We've all been there, or at least had nightmares about it. What you do in the next few minutes is absolutely critical. The first and most important rule to recover an HDD after a format is to stop using the drive. Immediately.
Power it down. Unplug it. Do whatever it takes to prevent your operating system from writing new data over the files you're trying to save. Those files aren't gone yet, they're just invisible.
What to Do Immediately After Formatting a Drive
Panic is the enemy here. A clear head and quick, deliberate actions are what will get your files back. Your one and only goal right now is to prevent anything new from being written to that drive, because new data will permanently overwrite your old files.
Every second that drive stays connected and powered on, background processes are whirring away. Windows is creating temp files, your browser might be caching data, and system updates could kick in at any moment. Think of it this way: a quick format just removed the table of contents from a book. The chapters are all still there, but if the librarian starts putting new pages in, the old ones are gone for good.
Stop All Drive Activity Now
This isn't a suggestion; it's the golden rule of data recovery.
- Internal HDD: If you formatted your main OS drive, shut the computer down. Don't go for a graceful shutdown that might write final log files—hold that power button down until it goes dark. No saving documents, no closing apps, just cut the power.
- External HDD: For an external drive, safely eject it. If your OS is being difficult, don't hesitate to just unplug the USB or power cable. Isolate that drive from the system completely.
This rapid response freezes the drive in its current state, giving you the best possible shot to recover the HDD after the format.
The key takeaway is this: A quick format doesn't erase data, it just marks the space as "available." Your job is to protect that space from being used before you can rescue what's in it.
To make this crystal clear, here’s a quick-reference table on the immediate do's and don'ts.
Immediate Actions to Maximize Recovery Success
This simple guide breaks down the essential first steps. Following these rules can be the difference between a full recovery and permanent data loss.
| Action to Take (DO) | Action to Avoid (DON'T) | Reasoning |
|---|---|---|
| Power down the computer or unplug the external drive immediately. | Do not save any new files, install software, or even browse the web. | Prevents new data from overwriting the 'deleted' files. Any write operation is a risk. |
| Create a disk image or sector-by-sector clone of the drive. | Do not run recovery software directly on the formatted drive. | Working from an image protects the original drive from stress and potential failure during recovery. |
| Use a separate computer to create the image and run recovery tools. | Do not boot from the formatted drive if it contains an operating system. | Booting reads and writes system files, which can destroy the very data you're trying to save. |
| Physically disconnect the drive until you're ready to image it. | Do not try to "fix" the drive by running chkdsk or other disk repair utilities. | These tools are designed to fix filesystem errors, not recover files, and can cause more harm. |
Sticking to the "DO" column keeps your data safe and recoverable. The "DON'T" column is a list of common mistakes that can lead to irreversible loss.
Why Creating a Disk Image Is Non-Negotiable
Before you even dream of running a recovery program, your very next step must be creating a disk image. This isn't a simple copy-paste of files; it's a perfect, bit-for-bit clone of the entire drive, including all the "empty" space where your lost data is hiding.
Trying to recover files directly from the formatted drive is playing with fire. Recovery scans are intensive and put a lot of stress on the drive's hardware. If the drive is already a bit old or has underlying issues, that could be the final straw.
Working from an image is the professional approach. It lets you run multiple recovery attempts with different tools without ever stressing the original hardware again. You're separating the act of preservation from the act of recovery.
This simple two-step emergency response is the foundation of any successful recovery.
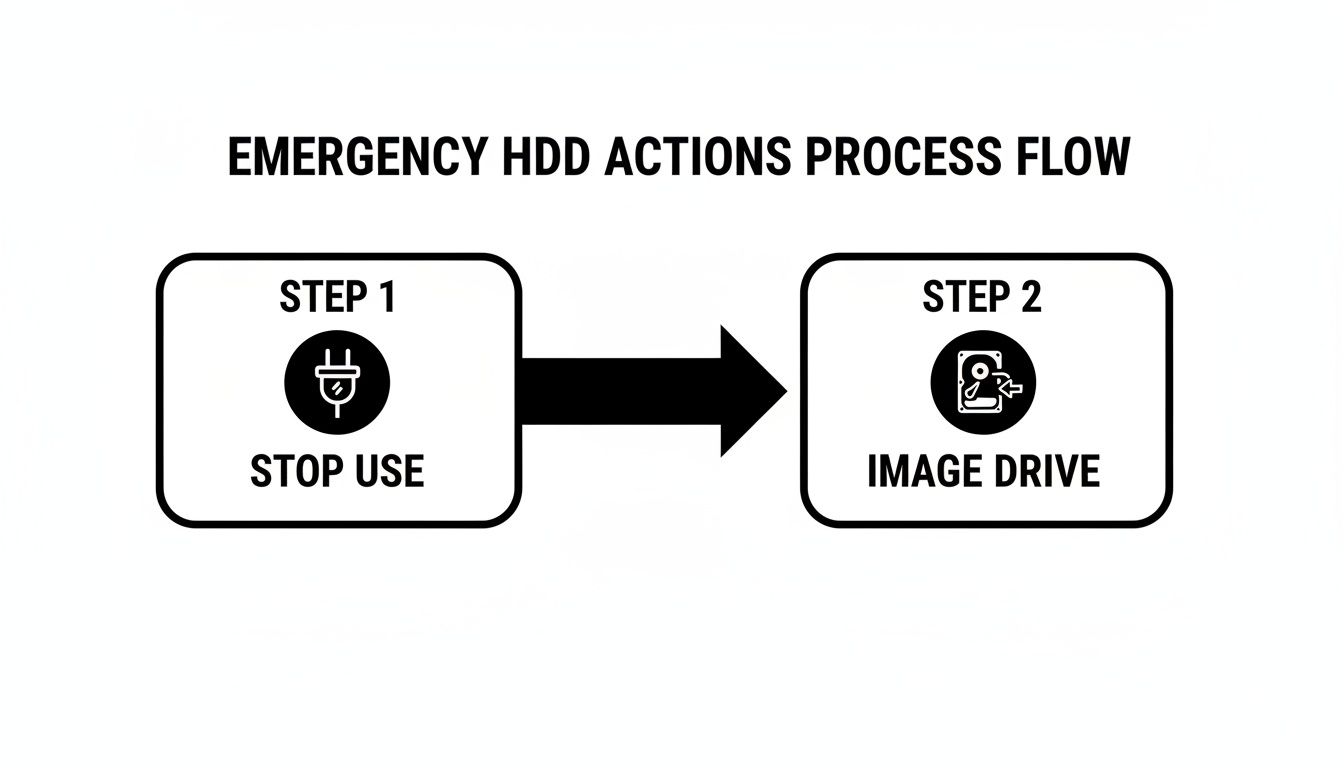
It really is that simple: Stop. Image. Then recover.
Believe it or not, the odds might be better than you think. Data from professional labs shows that, across all types of devices, about 78% of recovery attempts are successful. But that number nosedives the second new data gets written. You can learn more about professional data recovery success rates on 300dollardatarecovery.com to see why these first few steps are so vital. By stopping and cloning, you're keeping yourself in that high-success-rate bracket.
Quick Format vs. Full Format: What It Means for Your Data
The word "format" sounds terrifyingly final, doesn't it? But what it actually does to your data can vary wildly. The success of your mission to recover an HDD after a format really boils down to one critical question: was it a Quick Format or a Full Format?
The answer is the difference between a high chance of getting everything back and near-certain, permanent data loss.
Think of your hard drive’s filesystem as the table of contents in a book. It’s a map that tells your computer exactly where every file is physically located on the drive’s spinning platters. Without it, the operating system just sees a vast, blank space.
The Hopeful Scenario: Quick Format
A Quick Format is the default choice in modern operating systems like Windows, and for good reason—it's fast. And it's fast because it does surprisingly little.
All a quick format does is erase that "table of contents," the file allocation table. It then marks the entire drive as empty and ready for new data.
Here's the crucial part: the actual data, the chapters of your book, remains completely untouched. It’s all still there, right where you left it, just invisible to the operating system. This is fantastic news for recovery. As long as you don't start writing new files to the drive, specialized software can scan the drive sector by sector, find the old file structures, and piece it all back together.
For example, this is the standard Windows 7 format dialog box. Notice how "Quick Format" is checked by default.
You have to manually uncheck that box to do something more destructive. This means most accidental formats are the recoverable kind. Phew.
A Quick Format is your best-case scenario. It’s like losing the keys to your house but knowing the house is still standing. The data is present, just temporarily inaccessible through normal means.
The Challenging Scenario: Full Format
A Full Format, on the other hand, is a whole different beast. It's far more destructive.
Back in the days of Windows XP, a full format just checked the disk for bad sectors without wiping data. But from Windows Vista onward, a full format does something much more permanent: it writes zeroes over the entire drive.
This process is called zero-filling, and it actively overwrites every single bit of your original data with a '0'. Instead of just tossing out the table of contents, this is like putting every single page of your book through a shredder.
Let's break it down:
- Quick Format: Deletes the pointers to your files. The data is intact but unindexed. Recovery is highly likely.
- Full Format (Modern): Overwrites all data with zeroes. The data is permanently gone. Recovery is practically impossible.
If you intentionally unchecked that "Quick Format" box or used a specific disk-wiping tool, you probably performed a full format. And if that's the case, I'm sorry to say no software on earth can bring that data back. The original magnetic patterns that represented your files have been physically replaced.
Knowing which format happened is the first step. It helps you set realistic expectations before you sink time and effort into recovery attempts.
Create a Drive Image for a Risk-Free Recovery
Trying to recover files straight from a formatted drive is a huge gamble. I've seen it go wrong too many times. It’s like performing delicate surgery on a moving target—one wrong move, and you can cause irreversible damage. That's why the absolute first thing you must do, before you even think about running recovery software, is to create a disk image.
A disk image is a perfect, bit-for-bit clone of your entire drive. It’s not just copying the files you can see; it's a complete snapshot of everything, including the "empty" space where your supposedly lost data is still hiding. By imaging the drive, you freeze it in its current state, giving yourself a safe, static copy to work from.
This approach gets your original, potentially fragile hard drive out of the line of fire. The scanning process for data recovery is intense, and running different tools on the image file means you never have to touch the source drive again. You completely eliminate the risk of causing a physical failure or, even worse, accidentally overwriting the very files you’re trying to save.
Why Direct Recovery Is So Dangerous
When you run recovery software directly on a formatted HDD, you're putting a ton of stress on the hardware. These programs have to perform millions of read operations, scouring every single sector for remnants of your old file system.
If that drive is a few years old or was already acting a bit flaky, this intense activity can be the final push that sends it over the edge into complete mechanical failure. Don't just take my word for it. Large-scale data from places like Backblaze shows that consumer hard drives have an annualized failure rate of about 1.54%, and the average drive that dies is less than three years old. You can see the full breakdown of drive failure statistics from Backblaze.com. When you format an aging drive and then hammer it with a recovery scan, you’re dramatically increasing its odds of failing for good.
Working from a disk image is the professional standard for a reason. It separates the preservation of data from the recovery of data, ensuring that no matter what happens during the recovery attempt, your original drive remains untouched and in its last known state.
Think of it as your safety net. If one recovery tool messes up or corrupts the image file, no big deal. You just make a fresh copy from the original drive and try a different tool or strategy. Without an image, a failed recovery attempt could be your last. For situations where physical damage might be a factor, you might also want to check out our guide on how to recover from hard disk failure.
Powerful Tools for Creating a Drive Image
The good news is you don't need to spend a fortune to create a perfect, sector-by-sector clone. There are several powerful—and often free—tools trusted by IT pros and data recovery experts everywhere.
For Linux and macOS Users: GNU ddrescue
If you ask any data recovery pro, they'll likely point you to ddrescue. It’s the gold standard for imaging drives, especially ones that might have physical errors or bad sectors. It's built to be resilient where other tools would just give up.
- Intelligent Copying: When
ddrescuehits a read error, it doesn’t just stop. It smartly skips over the bad block, continues copying everything else, and then circles back later to try and get data from the problem areas. This massively reduces stress on a failing drive. - Logfile Functionality: It creates a logfile that tracks every single block it has copied. This is a lifesaver for big drives, as it lets you pause and resume the imaging process at any time. A 4TB drive can take a long time to clone, so being able to stop and restart is invaluable.
A typical command looks something like this: sudo ddrescue -f -n /dev/sda /path/to/image.img /path/to/logfile.log. This tells the tool to copy the source drive (/dev/sda) to an image file (image.img) and to not retry bad sectors on the first pass, which saves a lot of time and wear.
For Windows Users: Accessible Alternatives
While you can always boot a Linux live USB on a Windows PC to use ddrescue, there are some great user-friendly graphical options you can run directly in Windows.
- HDD Raw Copy Tool: This little utility is fantastic. It’s a simple, no-frills tool that does one thing and does it perfectly: creates a sector-by-sector image of a drive and saves it as an
.imgfile. - Macrium Reflect Free: It's mainly known as a backup tool, but its "Create an Image" feature includes an option to make a forensic-quality, sector-by-sector clone, which is exactly what we need.
No matter which tool you pick, the game plan is the same. You’ll need the formatted drive and a separate, healthy destination drive with enough free space. Connect both to a working computer, fire up your imaging software, and create the image of the formatted drive, saving it onto your healthy drive.
Once that image file is created and verified, you can safely disconnect the original formatted drive. Put it on a shelf. Your work from this point forward is done entirely on the safe, cloned image.
Choosing the Right Data Recovery Software

With a perfect image of your drive tucked away safely, you've done the most important thing: you've stopped the clock on any further data loss. Now comes the part where you actually get your files back.
The software you choose for this job can make or break your recovery attempt. There's a whole world of tools out there, from simple point-and-click programs to incredibly powerful suites that look like they belong at a digital forensics lab. The key is picking the right tool for your specific mess. Trying to recover a few accidentally deleted vacation photos is worlds apart from resurrecting a drive whose entire partition map was wiped out.
Let's walk through my go-to recommendations, starting with the simplest and working our way up to the heavy hitters.
For Beginners And Quick Scans: Recuva
If you’re not a tech wizard and your situation is straightforward—say, you formatted an SD card full of photos or an external drive with some documents—start with Recuva. It’s made by the same folks behind CCleaner, and its biggest win is its simplicity.
Recuva fires up a simple wizard that asks you what kind of files you’re trying to find and where you last saw them. This helps narrow the search and gets you results faster.
- It’s not intimidating. The guided process is a huge relief when you're already stressed about lost data.
- It has a "Deep Scan" mode. The first scan is quick, but for a formatted drive, you'll want to run the Deep Scan. It takes a lot longer but digs much deeper.
- You can preview files. For images and some documents, Recuva shows you a thumbnail before you recover, so you know you're grabbing the right thing.
But don't expect miracles. Recuva is fantastic for simple jobs, but it often comes up empty on drives with serious partition damage or less common file systems. It's the perfect first-response tool, but it has its limits.
For Damaged Partitions And Filesystems: TestDisk And PhotoRec
When the format has left your drive's structure a complete mess—maybe it's showing up as "RAW" or not showing up at all—you need to bring in the specialists. TestDisk and PhotoRec are a pair of open-source powerhouses that often succeed where fancier software fails. They come bundled together but do two very different things.
TestDisk is your partition repair expert. It’s a command-line tool, so no fancy graphics here, but it’s brilliant at finding and rebuilding a lost partition table. If your drive’s "map" is gone, TestDisk can redraw it. It’s not for the faint of heart, but it's saved my bacon more than once.
PhotoRec, despite the name, recovers way more than just photos. It’s what’s known as a "file carver." It completely ignores the broken file system and instead scans the raw data of the drive, looking for the digital fingerprints (signatures) that mark the beginning and end of a file.
Think of a file carver like PhotoRec as a data archaeologist. It doesn't need a map of the city (the file system) because it can identify artifacts (your files) just by sifting through the dirt (the raw data).
The big trade-off? Because PhotoRec ignores the file system, it can't recover original filenames, folders, or timestamps. You'll end up with a folder full of files named f12345.jpg and f12346.docx. It’s a massive cleanup job, but when it’s your only shot, you’ll take it.
For Professional-Grade Deep Recovery: R-Studio
When the data is absolutely critical and you need the best possible chance of getting it back with names and folders intact, it's time to invest in a professional tool like R-Studio. This is the kind of software the pros use, and for good reason.
R-Studio is a full-blown data recovery suite. It has advanced scanning algorithms that can intelligently reconstruct file and folder structures even after a format. It’s a beast with complex situations like broken RAID arrays and has native support for just about any file system you can throw at it, from Windows NTFS to macOS HFS+ and Linux Ext4.
It also gives you incredible control, letting you scan specific regions of a disk and even letting you view the raw data in a hex editor to manually diagnose tricky problems. While it costs money, R-Studio and similar pro tools offer a free demo mode. This lets you run a full scan and see a preview of exactly what files it can recover before you spend a dime. If it shows your files are there, paying for the license is a no-brainer.
Comparing Popular Data Recovery Tools
It's easy to get lost in the options. To make it clearer, here’s a quick breakdown of where each tool really shines.
| Tool Name | Best For | Ease of Use | Key Feature | Cost |
|---|---|---|---|---|
| Recuva | Simple, recent deletions on healthy drives; recovering common file types. | Very Easy | Wizard-driven interface and quick scan option. | Free (Pro version available) |
| TestDisk | Recovering lost or damaged partitions and making non-bootable disks bootable again. | Difficult | Powerful partition table repair capabilities. | Free (Open Source) |
| PhotoRec | Recovering files from severely corrupted or formatted drives when the file system is gone. | Moderate | Ignores the file system to "carve" raw files based on their signatures. | Free (Open Source) |
| R-Studio | Complex recovery scenarios, damaged RAID arrays, and when preserving file names is critical. | Advanced | Advanced scanning algorithms and support for a vast range of file systems. | Paid (Demo available) |
My advice is to work your way up the ladder. Start with Recuva. If that fails, move on to PhotoRec. If that data is priceless, running the R-Studio demo is your next logical step. And always, always run these scans on your disk image, not the original drive. You only get one shot to do this right.
Alright, you've reached the point where the recovery software has finished its scan. Seeing that progress bar hit 100% and getting a report of thousands of found files is a massive relief, but don't break out the champagne just yet. The real work is just beginning.
Now comes the hard part: sifting through a digital mountain of data to figure out what’s actually usable and what’s just digital junk.
You’re almost guaranteed to be looking at a chaotic mess. Recovery tools, especially the heavy hitters like PhotoRec that rely on file carving, usually can't piece together the original filenames or folder structure. The format wiped out the drive's "map," so the software is just guessing based on raw data signatures.
So instead of finding your neatly labeled Vacation_2023 folder, you'll be staring at a single directory crammed with thousands of files named f001234.jpg, f001235.docx, and so on. It's overwhelming, I know. But with a bit of a system, you can restore order.
The Triage: Sorting the Good from the Corrupt
First things first, you need to perform a quick triage. Just because a file shows up in the recovered list doesn't mean it works. Sometimes, a file gets partially overwritten, leaving you with something that looks right—it has an icon and a name—but is completely corrupt and won't open. The only way to know is to start checking.
A good first step is to organize everything by file type. Your operating system's file explorer can sort by "Kind" or "Type," which will instantly group all your JPEGs, PDFs, and MP4s.
- Images: Fire up a photo viewer and just start cycling through them. You'll quickly spot the bad ones. Corrupt images will often fail to load, show up as a solid grey box, or only display the top sliver of the picture.
- Documents: For things like DOCX, XLSX, or PDF files, just try opening a few from each group. If a handful open without throwing any error messages, there's a good chance the rest of that batch is okay, too.
- Videos & Audio: This is a bit more tedious. You’ll need to play a few seconds from the beginning, middle, and end of several media files. Corruption in videos often manifests as visual glitches, frozen frames, or weird audio static.
This sampling method gives you a fast and realistic idea of your recovery success rate without the soul-crushing task of checking every single file one by one.
What to Do with Files That Won’t Open
It’s one of the most frustrating moments in data recovery: you see the exact file you were desperate to save, but it just won't open. You get nothing but a "file is corrupt" error. This almost always means a tiny—but critical—piece of that file's data was overwritten by something new before you started the recovery.
When a recovered file won’t open, it’s a sign that some of its data clusters were claimed by new information after the format. The software found the file's beginning, but parts of its structure are permanently gone.
For most common file types, there’s sadly no magic fix for this. While specialized repair tools exist for complex formats like databases or certain video codecs, they're often expensive and have a pretty low success rate for this kind of damage.
Honestly, it’s usually best to cut your losses. Accept that these specific files are gone for good and focus your energy on organizing the ones that are intact. Don't waste hours trying to resurrect a single corrupt Word document when you have hundreds of good files to sort. Your time is far better spent building a new, logical folder structure on a completely separate, healthy drive for the data you successfully saved.
When to Hand It Over to a Professional
You've tried the software, you've run the deep scans, and maybe you've even gotten a few files back. But let's be honest, sometimes the DIY route just hits a wall. Pushing forward when you're out of your depth can quickly turn a recoverable situation into a permanent loss.
Knowing when to stop and call in an expert is just as important as knowing which tool to try first. This isn't about admitting defeat—it's about making a smart, strategic move to save your data.
The biggest, brightest red flag is any sign of physical hardware failure. If your drive is making any kind of weird noise—we're talking clicking, grinding, buzzing, or beeping—you need to power it down. Right now.
Those aren't happy sounds. Those are the sounds of a drive on its last legs. No software on earth can fix a physical problem like a seized motor or a damaged platter. Continuing to run a drive in this state is like trying to drive a car after the engine has seized; you're just making the damage catastrophically worse with every passing second.
Telltale Signs of Physical Failure
If you notice any of these symptoms, your only safe move is to unplug the drive and find a pro. Don't even think about trying another piece of software.
- Strange Noises: The infamous "click of death," any grinding sounds, or a high-pitched whine are deal-breakers.
- Drive Isn't Detected: Your computer's BIOS, Disk Management, or Finder can't see the drive at all. It's invisible.
- Glacially Slow Performance: The drive takes forever to show up, or the simple act of trying to open a folder freezes your entire system.
- A Burnt Smell: If you smell something like burnt plastic, that's almost certainly a fried controller board.
These are all symptoms of problems that require a cleanroom, specialized hardware, and skills that go far beyond what any downloadable tool can offer.
When the Data Is Too Valuable to Risk
Physical failure aside, there's another crucial factor: the value of the data itself.
You have to ask yourself one simple question: What's the real cost—financially or emotionally—if I fail to recover this HDD after the format and this data is gone forever?
If the answer involves critical business records, years of irreplaceable family photos, or essential financial documents, the risk of making a mistake yourself might be too high. Professional recovery services use proprietary tools and have experience that goes way beyond consumer-grade software. They can often reconstruct file systems and repair metadata in ways that off-the-shelf programs simply can't handle.
A professional data recovery lab is playing a completely different game. They use hardware imagers that can read around bad sectors, work in sterile cleanrooms to prevent contamination during physical repairs, and have engineers who solve problems that would stump even the best software.
Yes, professional service costs money. But you have to weigh that cost against the value of what you're about to lose permanently. For data that is truly irreplaceable, it's often a small price to pay for a much higher chance of success.
If you're in a tough spot with high-value data on the line, exploring a professional recovery service is the most responsible next step. They can give you a proper diagnosis and a quote, letting you make an informed decision without putting your files at further risk.
At Wallet Recovery AI, we understand just how valuable your digital assets are. While our primary focus is on restoring access to lost cryptocurrency wallets, the principles of secure, careful recovery apply everywhere. If you've lost access to your crypto because of a forgotten password or a damaged device, our AI-driven approach can help you get it back. See how we can help at https://walletrecovery.ai.
Leave a Reply